Introduction
You’ve invested in quality tactical gear, but are you getting the most out of it? Understanding how to unity tactical equipment properly can mean the difference between smooth operations and fumbling when it matters most. Whether you’re in law enforcement, military service, or simply a firearms enthusiast who values preparedness, knowing how to integrate your tactical systems effectively is essential.
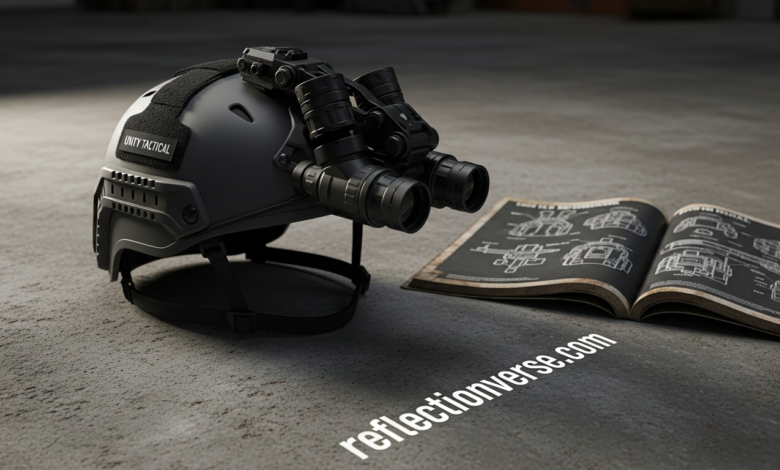
The term “unity tactical” refers to creating a cohesive, unified system where every piece of your gear works together seamlessly. It’s not just about owning the right equipment. It’s about understanding how each component connects, communicates, and complements the others. This approach transforms individual pieces into a complete tactical solution.
In this guide, you’ll discover practical methods to unity tactical gear systems, from mounting solutions to lighting integration. We’ll cover everything from basic setup principles to advanced configuration techniques that professionals rely on in the field.
Understanding Unity Tactical Systems
Before you can effectively unity tactical components, you need to understand what makes a system truly unified. A proper tactical setup isn’t just a collection of accessories bolted onto your platform. It represents a carefully planned integration where each element serves a specific purpose.
Modern tactical systems focus on three core principles. First, every component must be accessible without disrupting your grip or sight picture. Second, controls should fall naturally under your hands without requiring you to search or fumble. Third, everything must work together without creating interference or redundancy.
When you unity tactical gear correctly, you eliminate wasted movement. Your light activates exactly where your support hand naturally rests. Your optic sits at the perfect height for a consistent cheek weld. Your backup sights appear instantly in your field of view if your primary optic fails.
Think of it like organizing your kitchen. You don’t put the coffee maker in the garage and the mugs in the bedroom. Everything has its place based on how you actually use it. The same logic applies when you unity tactical equipment on your platform.
Essential Components for Tactical Unity
To properly unity tactical systems, you need to understand the key components that work together. Let’s break down the essential elements and how they integrate into a cohesive setup.
Mounting platforms form the foundation of any unified system. These include Picatinny rails, M-LOK slots, and KeyMod interfaces. Your mounting platform determines where and how you can attach accessories. Choose a platform that provides enough real estate without adding unnecessary weight.
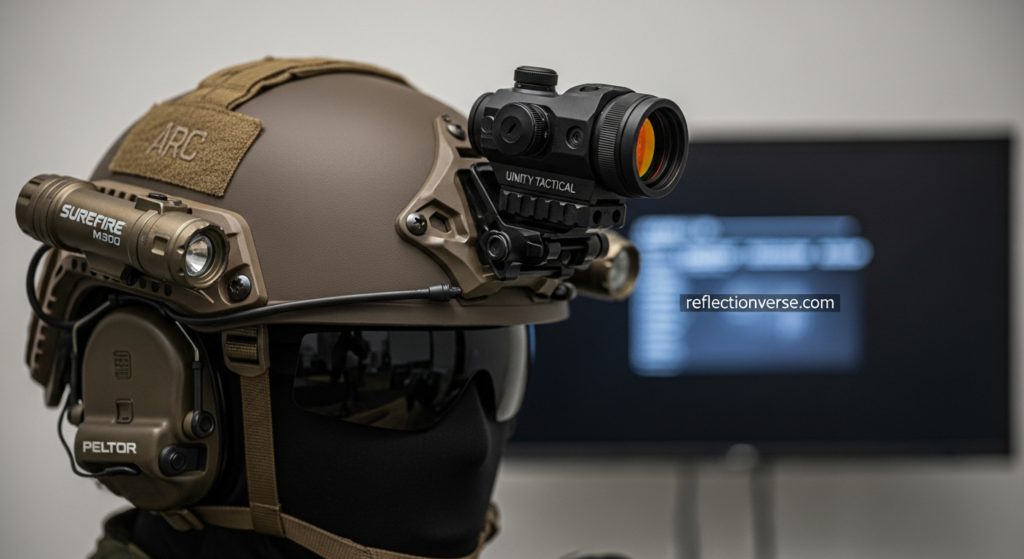
Optics and sighting systems give you target acquisition capability. This includes red dots, holographic sights, magnified optics, and backup iron sights. The key is mounting height. When you unity tactical optics correctly, you achieve a natural heads-up shooting position that reduces neck strain and speeds target transitions.
Illumination tools let you identify threats in low light conditions. Weapon-mounted lights need proper placement for maximum illumination without creating shadows from your barrel or suppressor. Laser aiming devices provide additional targeting options, especially under night vision.
Activation controls tie everything together. Remote switches, pressure pads, and integrated buttons let you control lights and lasers without breaking your grip. Proper placement of these controls is crucial when you unity tactical components for real-world use.
Communication between components matters too. Some systems allow your optic and light to work together, automatically adjusting brightness based on ambient conditions. Others let you program multiple activation modes from a single switch.
Step-by-Step Setup Process
Ready to unity tactical gear on your platform? Follow this systematic approach to ensure everything integrates properly.
Planning Your Configuration
Start by determining your primary use case. Home defense requires different setup than competitive shooting or duty use. List every component you plan to mount. Measure your available rail space. Sketch out where each item will go before you start installing anything.
Consider your shooting stance and grip. Where does your support hand naturally rest? That’s where your primary controls should live. Where do your eyes naturally align when you shoulder your platform? That’s your optic height.
Mounting Your Optic
Your optic serves as the cornerstone when you unity tactical systems. Mount height affects everything else. Too low and you’ll scrunch down for a sight picture. Too high and you’ll lose stability and cheek weld.
For absolute cowitness, your optic sits low enough that iron sights appear in the lower third of your view. For lower third cowitness, iron sights appear in the bottom portion of your optic window. Many shooters prefer a 1.93-inch or 2.26-inch mount height for a more natural heads-up position.
Torque your optic mount to manufacturer specifications. Under-tightening leads to shift under recoil. Over-tightening can crack your optic housing or strip threads. Use a proper torque wrench and apply thread locker to critical fasteners.
Installing Illumination
Weapon lights typically mount at the 12 o’clock, 3 o’clock, or 9 o’clock positions. The 12 o’clock position keeps weight centered but may create shadows. Side mounting keeps the light clear of barrel accessories but shifts weight off-center.
When you unity tactical lights properly, the beam pattern should illuminate your target without excessive spill that ruins your night vision. Position the light far enough forward to minimize shadow from your muzzle device or suppressor.
Lasers require careful zeroing. Most modern lasers let you zero at 25 yards for practical engagement distances. Remember that laser trajectory and bullet trajectory diverge significantly at close range due to offset.
Routing Cables and Switches
Cable management separates professional setups from amateur attempts. When you unity tactical activation systems, cables should run cleanly without snagging or creating pressure points.
Route cables along the rail system using zip ties, tape, or dedicated cable management solutions. Leave enough slack for normal manipulation but not so much that cables dangle or snag. Protect connection points from impact and moisture.
Position your activation switch where your thumb naturally rests. For most shooters, this means the top rail near the handguard’s front end. Test your grip repeatedly before permanently mounting switches.
Zeroing and Testing
After you unity tactical components physically, you must zero them operationally. Start with your primary optic. Establish a solid zero at your chosen distance, typically 25, 50, or 100 yards depending on your ammunition and application.
If you’re using backup iron sights, zero them independently. Don’t assume they’ll align perfectly with your optic. Test both sighting systems to confirm your zero holds under recoil and across temperature changes.
For lights and lasers, verify they activate consistently and don’t flicker under recoil. Check battery contacts and switch connections. Run your system hard during testing. It’s better to discover problems on the range than in a critical situation.
Advanced Integration Techniques
Once you master the basics of how to unity tactical gear, you can explore advanced integration methods that enhance performance.
Height Over Bore Management
Understanding height over bore becomes crucial as you stack components. When you unity tactical optics at taller mount heights, the offset between your line of sight and bore axis increases. This affects close range accuracy.
At 7 yards with a 2.26-inch mount, your point of impact sits roughly 2 inches below your point of aim. By 25 yards, this offset disappears as trajectories converge. Know your holdovers for the distances you’re likely to engage.
Some shooters cant their platform slightly to compensate for height over bore at extreme close range. Others simply learn the offset and adjust their aim point. There’s no single right answer, only what works for your specific situation.
Multi-Mode Integration
Modern systems let you program complex activation patterns. When you unity tactical lights and lasers together, you might set up momentary white light on a light press, constant laser on a firm press, and both simultaneously on a double press.
These programmable systems reduce the number of switches you need while increasing capability. However, they require training to use effectively under stress. Keep activation patterns intuitive. Complexity that seems clever on the workbench becomes liability under pressure.
Night Vision Compatibility
If you run night vision, everything changes when you unity tactical components. Your optic needs night vision settings that don’t bloom or wash out your tubes. Your light needs an infrared mode. Your laser needs to be IR capable.
Visible light discipline becomes critical. Even a tiny amount of white light spill can ruin your night adapted vision for 20-30 minutes. When you unity tactical gear for night vision use, every component must support covert operation.
Modular Approaches
The most versatile setups use modular mounting systems. Quick detach mounts let you reconfigure your platform for different missions. Swappable light heads let you choose between flood and throw patterns without changing mounting positions.
When you unity tactical systems modularly, you maintain consistency across different configurations. Your muscle memory stays intact because activation points don’t change even when you swap components.
Common Mistakes to Avoid
Even experienced shooters make errors when they unity tactical equipment. Avoiding these pitfalls saves time, money, and frustration.
Over-accessorizing tops the list. Just because you have rail space doesn’t mean you should fill it. Every ounce you add affects handling. Every protrusion creates snag points. Add only what you actually need and use.
Ignoring ergonomics leads to awkward shooting positions. Your setup might look impressive but feel terrible in practice. If you have to stretch, twist, or contort to reach controls, you’ve failed to properly unity tactical components for your body mechanics.
Skipping quality checks creates reliability issues. Loose fasteners allow components to shift under recoil. Inadequate thread locker lets screws back out. Take time to verify every connection before relying on your setup.
Neglecting training with your unified system wastes its potential. You must practice until activation becomes instinctive. Dry fire regularly. Run drills that stress your skills and equipment. Equipment alone doesn’t create capability.
Forgetting maintenance allows problems to develop. Batteries die. O-rings deteriorate. Thread locker weakens over time. Schedule regular inspections and preventive maintenance. Clean contact points. Verify zero. Replace consumables before they fail.
Optimizing for Your Specific Needs
There’s no universal way to unity tactical gear because everyone’s needs differ. Customize your approach based on your circumstances.
For Home Defense
Home defense setups prioritize reliability and simplicity. When you unity tactical components for home protection, choose bombproof equipment that works every time. Avoid complexity that might fail under stress or require batteries you forgot to change.
A quality weapon light with a simple on and off switch often suffices. Position it where you can activate it naturally without thinking. Keep backup lighting readily available. Consider how your setup works in confined spaces with limited movement.
For Professional Use
Professional applications demand durability and flexibility. When you unity tactical systems for duty use, build redundancy into critical functions. Multiple lighting options. Backup sighting systems. Components proven across thousands of rounds and harsh conditions.
Professional setups also need to meet departmental standards and legal requirements. Verify your configuration complies with relevant regulations before deploying it in an official capacity.
For Competition
Competition shooting lets you optimize purely for performance. When you unity tactical gear for matches, minimize weight while maximizing speed. Position controls for lightning fast activation. Choose optics with massive windows and crisp dots.
However, keep competition setups practical. Skills and muscle memory should transfer to defensive applications. Don’t train yourself into habits that only work on flat ranges with perfect conditions.
Maintenance and Upkeep
Your unified system requires ongoing care to maintain peak performance. Establish maintenance routines and stick to them.
After each use, inspect mounting hardware for looseness. Check cables for damage. Verify activation switches work smoothly. Wipe down external surfaces to remove dirt, powder residue, and moisture.
Monthly, remove optics and accessories for detailed cleaning. Inspect o-rings and seals. Apply fresh thread locker to critical fasteners if needed. Test battery voltage and replace batteries approaching depletion.
Annually, conduct comprehensive function checks. Reconfirm zero. Verify night vision compatibility if applicable. Update firmware on programmable components. Replace wear items before they fail.
Keep detailed records of your maintenance. Note when you change batteries, reapply thread locker, or make configuration changes. This documentation helps you identify patterns and prevent recurring issues.
Conclusion
Learning how to unity tactical systems effectively transforms disparate components into cohesive tools that enhance your capabilities. The process requires careful planning, methodical execution, and ongoing refinement based on your actual use.
Remember that equipment alone doesn’t create competence. The finest unified tactical system in the world means nothing without training and practice. Invest time mastering your setup. Run it hard under realistic conditions. Identify weaknesses and address them systematically.
Start with the fundamentals covered in this guide. Mount your optic at the right height. Position your light for optimal illumination. Route cables cleanly. Place switches where they fall naturally under your hands. Then practice until everything becomes instinctive.
Your unified tactical system should feel like an extension of yourself. When you reach that point, you’ll know you’ve successfully integrated everything into a tool you can trust when it matters most.
What aspect of your tactical setup do you find most challenging to optimize? Share your experiences and questions in the comments below.
Frequently Asked Questions
What does it mean to unity tactical gear?
To unity tactical gear means creating an integrated system where all components work together seamlessly. This involves proper mounting, cable management, and positioning accessories so they’re accessible and functional without interference. The goal is transforming individual parts into a cohesive tool.
What is the best mount height for tactical optics?
The ideal mount height depends on your shooting style and physical build. Absolute cowitness (1.42 inches) works for traditional shooting positions. Lower third cowitness (1.54 inches) is versatile for most users. Taller mounts (1.93 inches or 2.26 inches) provide better ergonomics for heads-up shooting but increase height over bore offset.
Where should I mount my weapon light?
Most shooters mount weapon lights at the 3 o’clock or 9 o’clock position on the handguard, far enough forward to minimize barrel shadow. The 12 o’clock position works but may interfere with optics or create more pronounced shadows. Choose based on your grip style and other accessories.
How often should I check my tactical setup?
Inspect your setup after every use for obvious damage or looseness. Conduct thorough checks monthly, including battery testing and hardware inspection. Annually, perform complete function verification including zero confirmation and component replacement as needed.
Can I use the same setup for different purposes?
While possible, optimal performance usually requires different configurations for different roles. Competition setups prioritize speed and weight savings. Defensive setups prioritize reliability and simplicity. Professional applications need durability and redundancy. Consider building purpose-specific configurations if you have diverse needs.
Do I need expensive components to unity tactical systems properly?
Quality matters more than price tags. Reliable mid-range components properly integrated outperform expensive gear thrown together haphazardly. Invest in proven, durable items for critical functions like optics and lights. Save money on accessories like rail covers and sling mounts where brand names matter less.
How do I know if my tactical system is properly unified?
A properly unified system feels natural and intuitive. You should be able to operate every control without looking or thinking. Nothing should interfere with your grip, sight picture, or weapon manipulation. If you find yourself fumbling, adjusting position, or compromising your stance to use equipment, refinement is needed.
What tools do I need to unity tactical components?
Basic tools include a torque wrench with appropriate bits, thread locker, Allen keys or Torx drivers matching your hardware, cable ties or tape for cable management, and a level for mounting optics. Avoid improvising with incorrect tools that can damage expensive components.
Also read reflectionverse.com